Editing
Pagelier can do more than comment: you can pick up existing text and images on a page and move, change or delete them, add your own text, shapes, stamps and images, and give every page a header and footer, page numbers or a watermark. Every step can be undone.
The editing bar
The editing tools live in a bar of their own. Show or hide it with the plus icon ✚ in the toolbar (tooltip: Bearbeiten: Text, Formen, Stempel, Bilder, Schwärzen, Zuschneiden – edit: text, shapes, stamps, images, redact, crop). Hiding the bar also switches off any editing tool that is currently active.
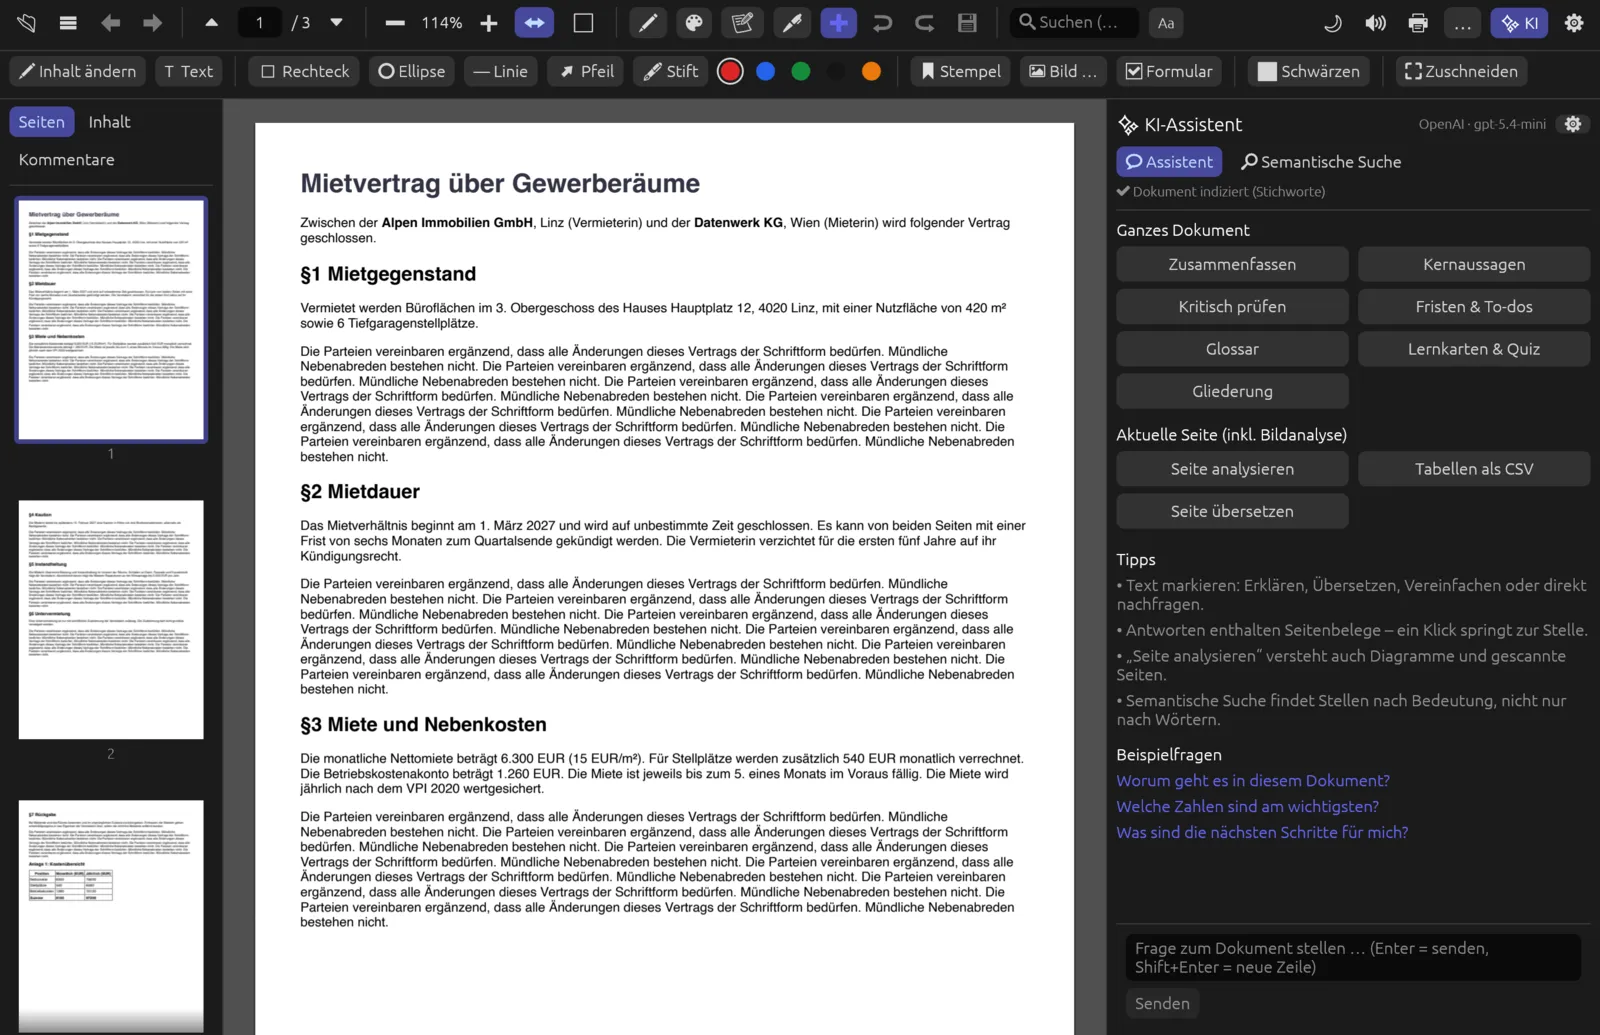
| Button | What it does |
|---|---|
| ✏ Inhalt ändern (edit content) | Select, move, resize, change and delete existing text, images and graphics on the page (see below). |
| T Text | Click on the page and type new text. |
| Rechteck (rectangle), Ellipse, Linie (line), Pfeil (arrow) | Draw a shape by dragging on the page. |
| ✒ Stift (pen) | Draw freehand. |
| Five colour dots | Colour for text, shapes and pen: Rot (red), Blau (blue), Grün (green), Schwarz (black), Orange. The selected colour has a ring. |
| 🔖 Stempel (stamp) | Menu with six stamps; then click on the page. |
| 🖼 Bild … (image) | Choose a PNG or JPEG file, then click on the page. |
| ☑ Formular (form) | Create form fields – see Forms & Signature. |
| ⬛ Schwärzen (redact) | Mark areas for redaction – see Redacting, Protecting & Signing. |
| ⛶ Zuschneiden (crop) | Drag out the visible area of the page – see Pages & Documents. |
One click on a button switches the tool on; a second click or Esc switches it off. The active tool is highlighted.
Changing existing content
With ✏ Inhalt ändern you edit what is already in the PDF – not just your own annotations. As soon as the tool is active, Pagelier draws a thin outline around every text and image object on the page. The object under the pointer gets a bold frame and the pointer turns into a move cross.
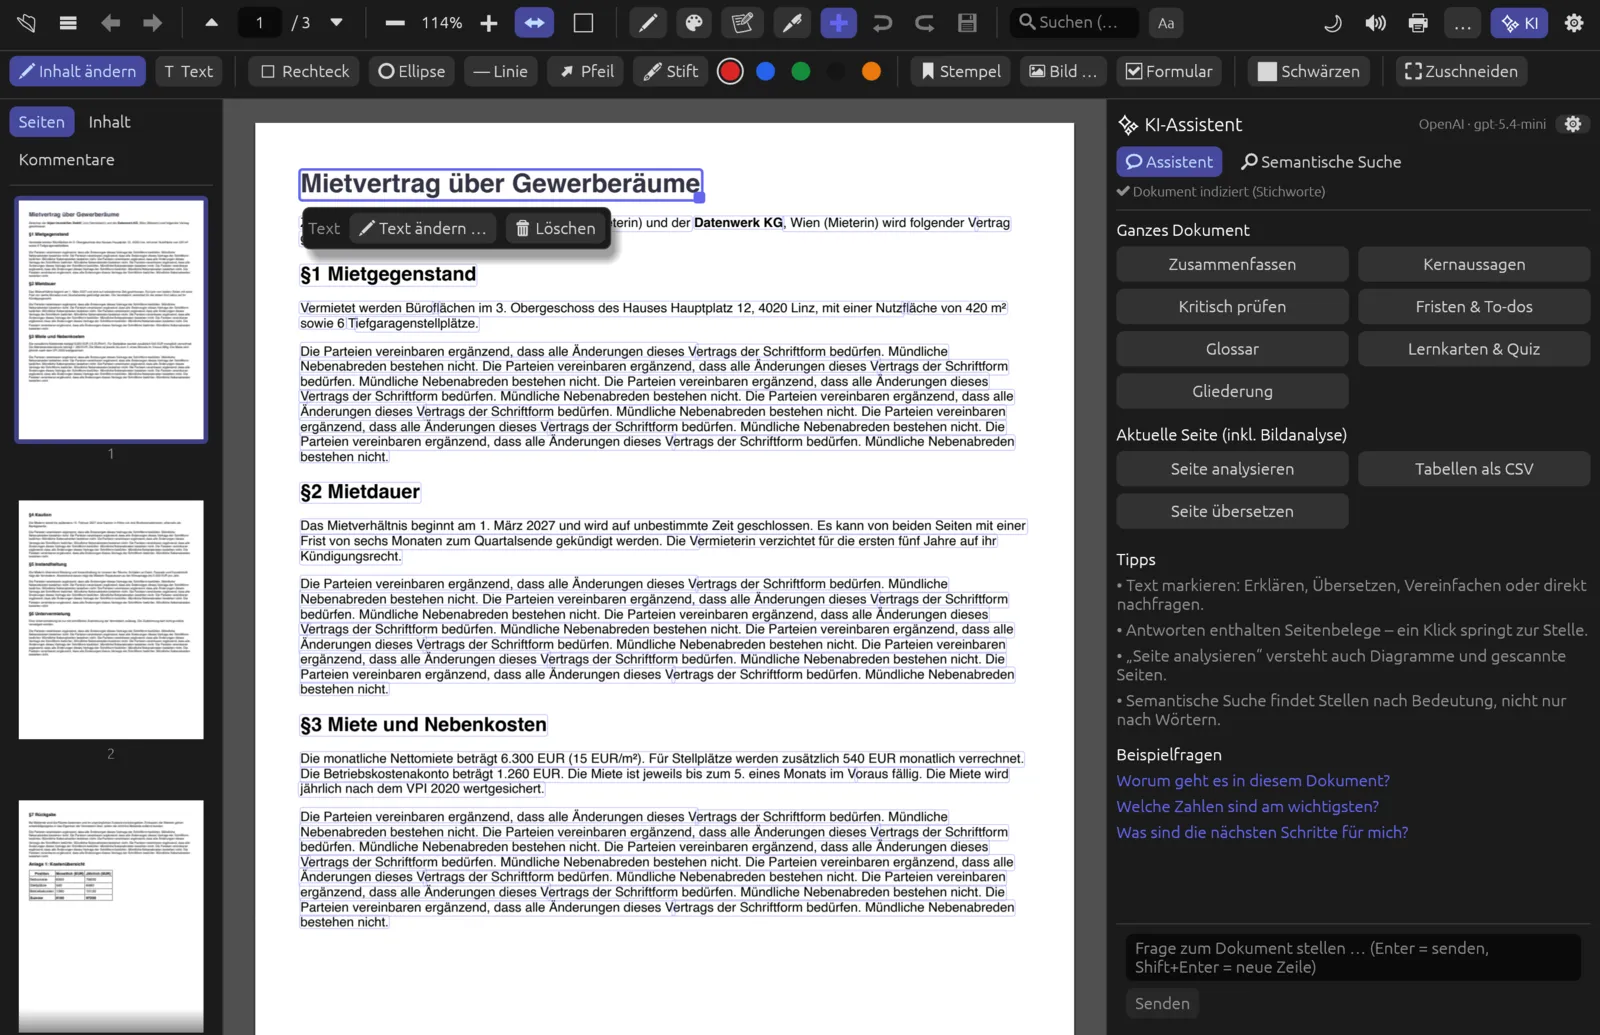
- Select: click an object. It gets a frame with a small handle at the bottom right, and below it a bar appears with the object type (Text, Bild – image, Grafik – graphic, or Gruppe – group) and the matching buttons. Where objects overlap, the smallest one wins.
- Move: drag the object. A blue area shows where it will land.
- Resize: drag the handle at the bottom right. Text and images keep their aspect ratio; graphics (lines, filled areas) can be changed freely in width and height.
- Change text: double-click a text object or use ✏ Text ändern … (change text). An input box opens right over the text; Übernehmen (apply) or Enter inserts the new text, Abbrechen (cancel) or Esc discards it.
- Replace image: for an image, choose 🖼 Bild ersetzen … (replace image) and pick a PNG or JPEG file. The new image takes the position and size of the old one.
- Delete: 🗑 Löschen (delete) or Delete / ⌫.
- Deselect: Esc or a click on an empty spot.
The same buttons are also in the context menu when you right-click an object.
Fixing a typo in a PDF
- Show the editing bar with ✚ and click ✏ Inhalt ändern.
- Double-click the line of text containing the mistake.
- Correct the text in the input box.
- Press Enter. The page is redrawn; ⌘ Z reverts the change.
- Save with ⌘ S, or under a new name via (save as).
Limits when changing text: PDF is not a word-processing format. A text object is usually one line or part of one; Pagelier replaces exactly that object and moves the rest of the same line along; nothing flows into the next line. Longer text can therefore run over the right margin – shorten it or shrink the object if that happens. Line breaks become spaces. If the embedded font lacks the new characters (many PDFs embed only the letters actually used), Pagelier sets the text in a similar standard font (Helvetica, Times or Courier); the hint Fehlende Zeichen: ähnliche Standardschrift (missing characters: similar standard font) in the input box points this out. Always check the result on the page.
Adding text, shapes, stamps and images
Text
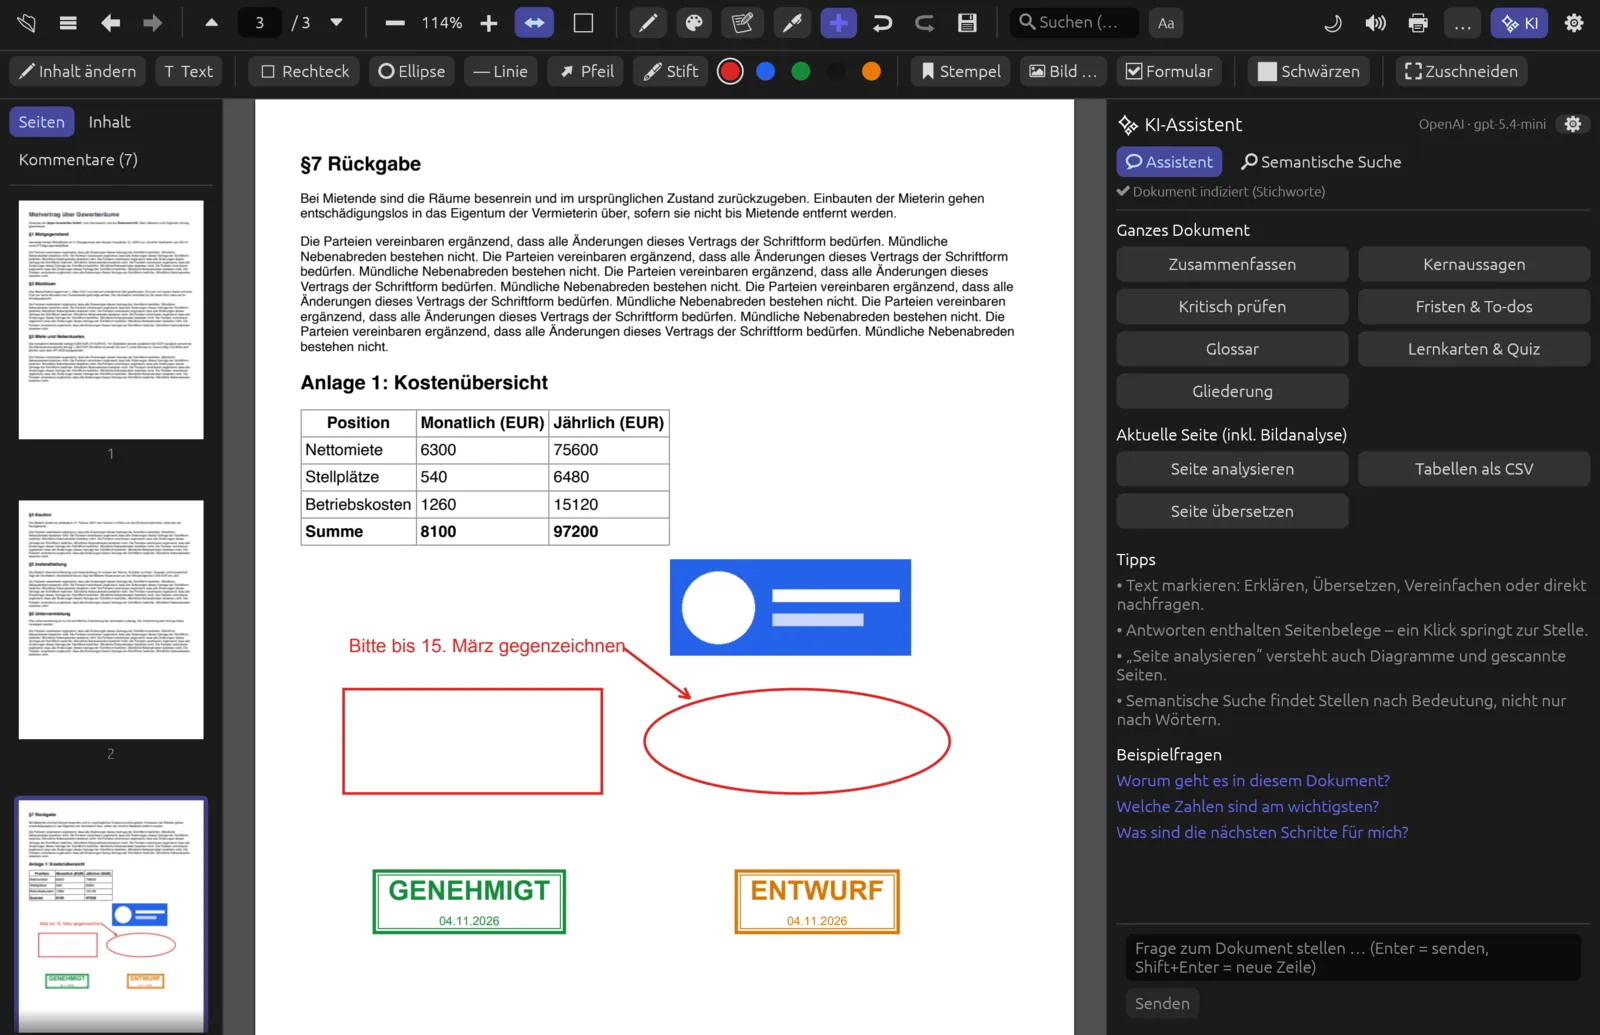
Choose T Text (or right-click an empty spot and choose Text hier einfügen – insert text here) and click on the page. An input box opens: type the text – multiple lines are fine – set the font size in points on the right (6–72 pt) and click Einfügen (insert) or press ⌘ Enter. The text appears in the selected colour. For the next text, Pagelier suggests the font size you used last.
Shapes and pen
Choose Rechteck, Ellipse, Linie or Pfeil and drag on the page from one corner (or the start) to the other. With ✒ Stift you draw freehand. Shapes and lines have a stroke width of 2 pt in the selected colour. These tools stay active until you switch them off, so you can draw several shapes in a row.
Stamps
The 🔖 Stempel menu offers six stamps: GENEHMIGT (approved, green), ERLEDIGT (done, blue), ENTWURF (draft, orange), VERTRAULICH (confidential) and ABGELEHNT (rejected), both red, and KOPIE (copy, grey). Each stamp shows today's date below its label.
Stamping a document as approved
- In the editing bar click 🔖 Stempel and choose GENEHMIGT. The button now shows the selected stamp.
- Move the mouse over the page: an outline shows where the stamp will land.
- Click. The stamp is centred on that spot, and the tool switches off again.
Image
Click 🖼 Bild … and choose a PNG or JPEG file. Pagelier reports “Auf die Seite klicken, um das Bild einzufügen” (click on the page to insert the image), and a blue rectangle the size of the image follows the pointer. A click centres the image on that spot.
Changing what you added
Pagelier creates text, shapes, freehand lines, stamps and images as annotations. They therefore appear in the comment list (see comment list) and can be deleted like highlights: right-click on the page and choose Anmerkung löschen (delete annotation). You cannot move or resize them – undo the step with ⌘ Z and place the element again.
Header and footer, page numbers, watermark
(document › header/footer, page numbers, watermark) adds text to all pages at once.
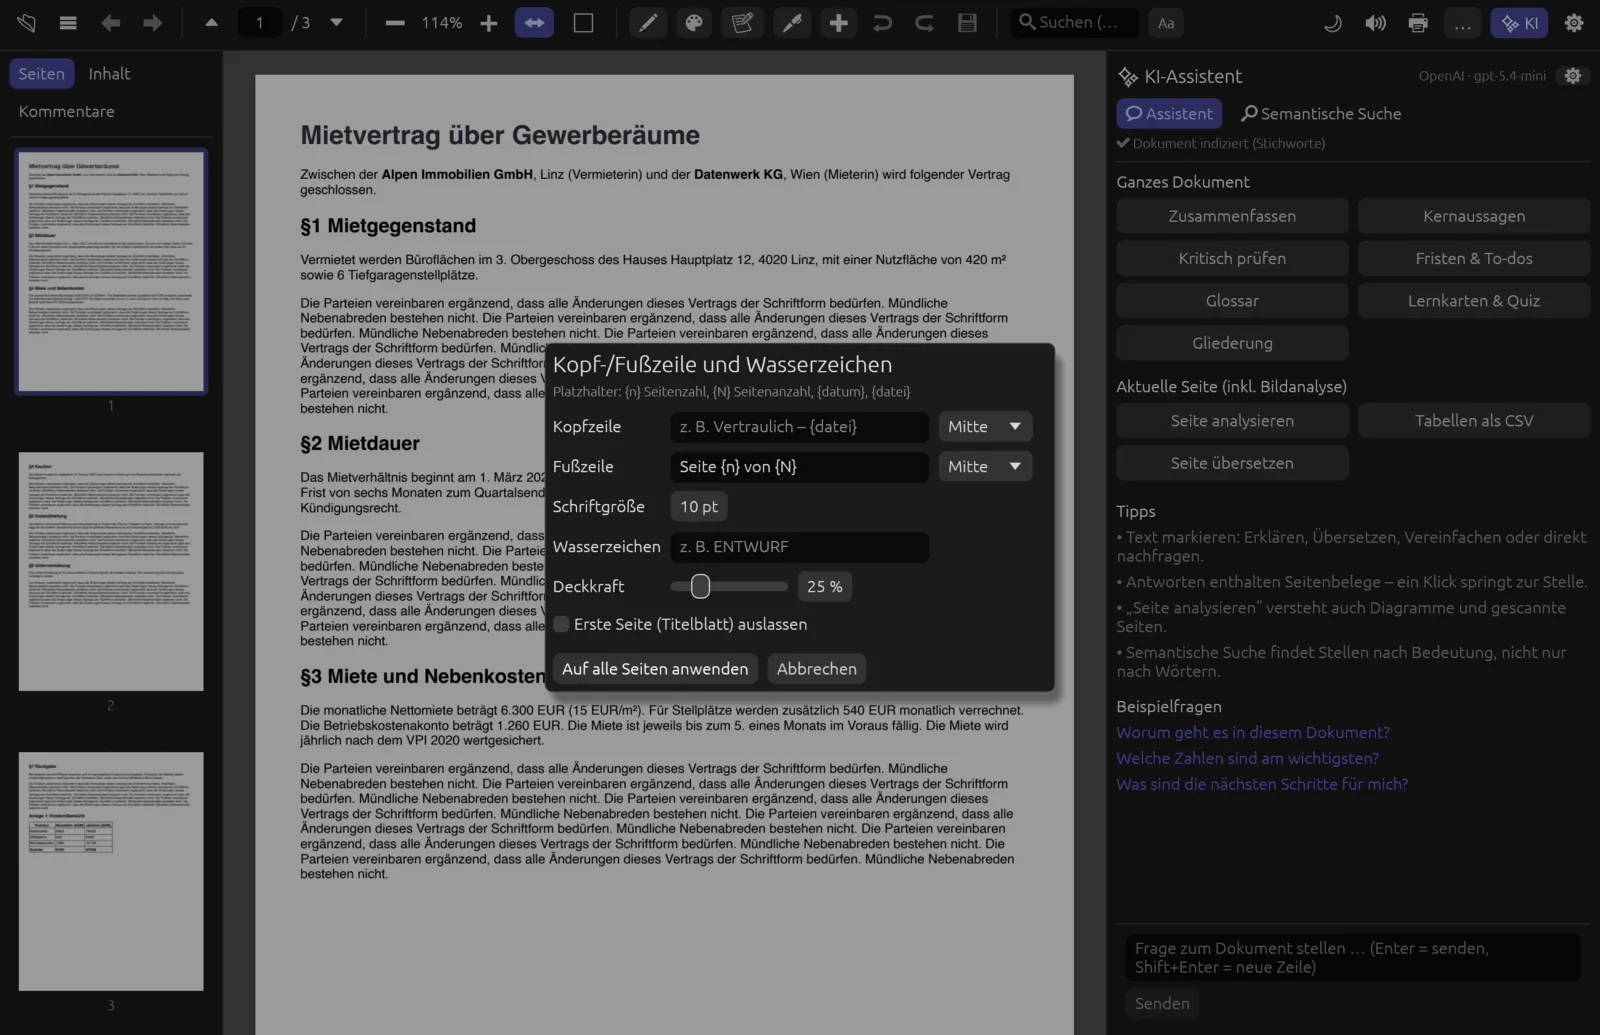
| Field | Meaning |
|---|---|
| Kopfzeile (header), Fußzeile (footer) | Text at the top or bottom of every page, with the alignment Links (left), Mitte (centre) or Rechts (right) next to it. |
| Schriftgröße (font size) | 6–24 pt for header and footer. |
| Wasserzeichen (watermark) | Large, diagonal grey text across the page, such as “ENTWURF”. |
| Deckkraft (opacity) | How strongly the watermark shows (5–100 %, default 25 %). |
| Erste Seite (Titelblatt) auslassen (skip first page) | The first page gets none of it. |
All three texts accept placeholders: {n} for the page number, {N} for the number of pages, {datum} for today's date and {datei} for the file name.
Adding page numbers and a watermark
- Open .
- Leave “Seite {n} von {N}” in Fußzeile and choose the alignment (the text is German; write “Page {n} of {N}” if you prefer).
- Enter a Kopfzeile if needed, for example “Confidential – {datei}”.
- Type “DRAFT” into Wasserzeichen and set the Deckkraft.
- Click Auf alle Seiten anwenden (apply to all pages).
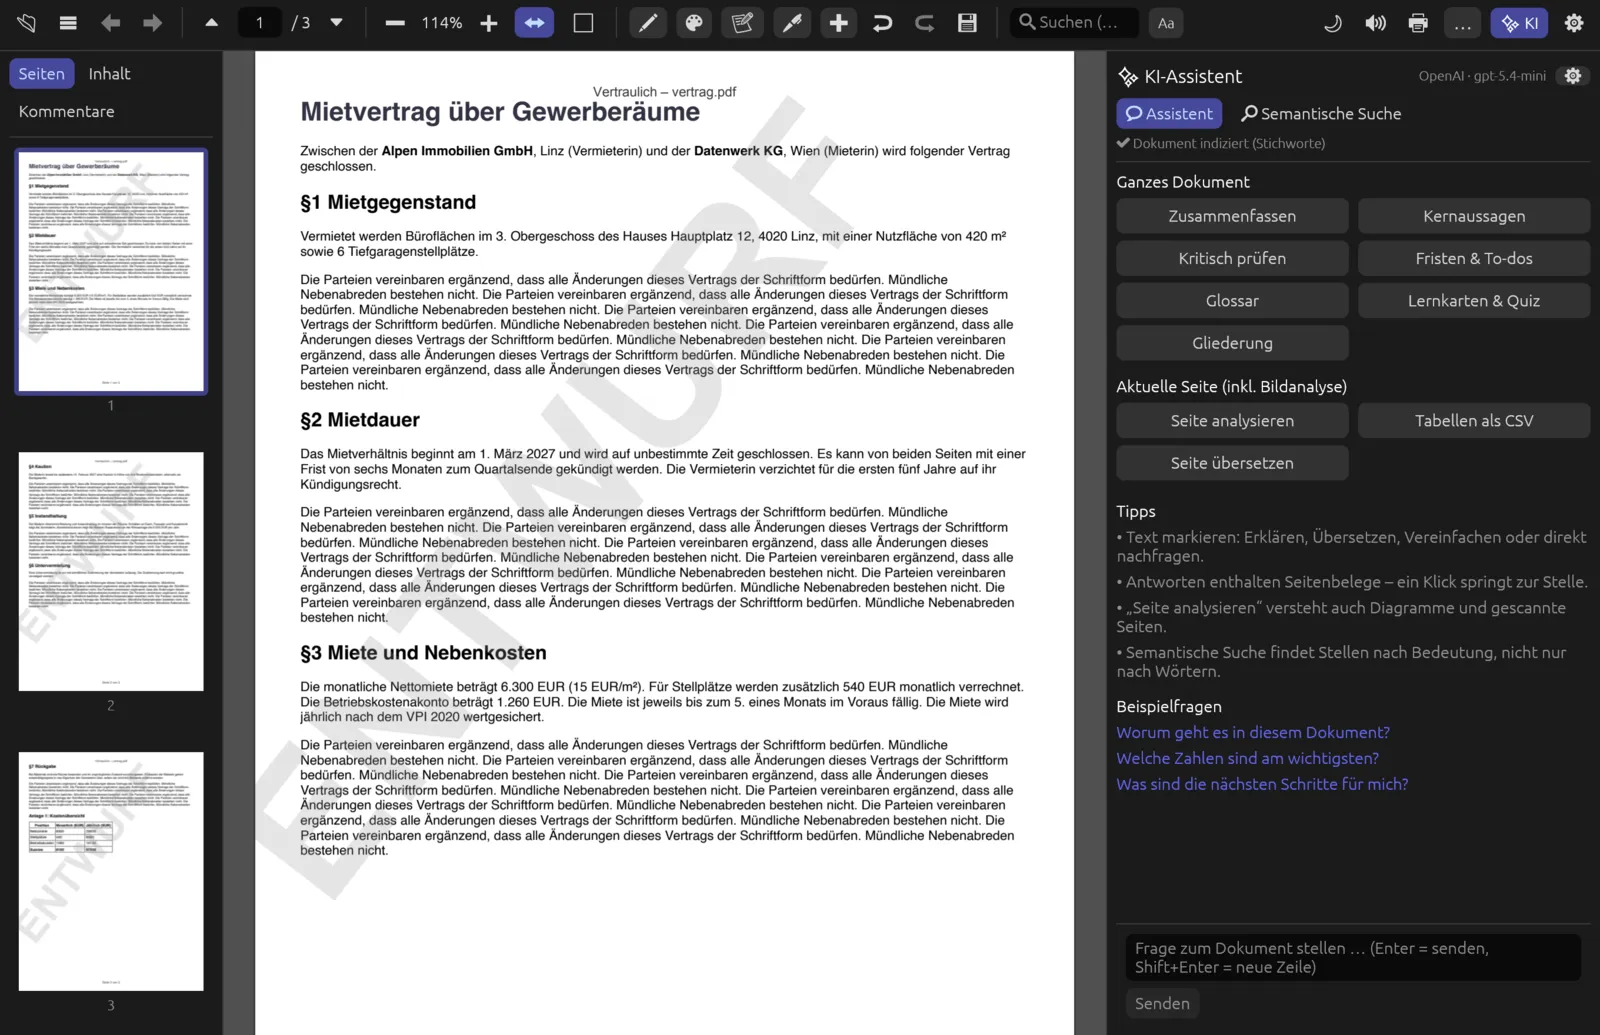
Header, footer and watermark are written into the page content itself, not added as annotations. If you apply the dialog a second time, the text is added a second time – so undo a failed attempt with ⌘ Z first.
Undo, redo and saving
Every edit – changing text, moving an object, drawing a shape, adding a header – is a step of its own. ⌘ Z or ↩ reverts the last one; ⌘ ⇧ Z (or ⌘ Y) or ↪ restores it. All changes stay in the open document until you save with ⌘ S; if you close before that, Pagelier asks. To keep the original, save a copy with (⌘ ⇧ S).