Forms & Signature
An application, a registration form, a contract to sign: Pagelier fills in PDF forms right on the page, creates your own fields when needed and places your handwritten signature with a single click – no printing and scanning required.
Filling in forms
If a PDF contains form fields, you can fill them in straight away – no special mode is needed. When you hover over a field it gets a blue frame; over text fields the pointer becomes a text cursor, over boxes and lists a hand.
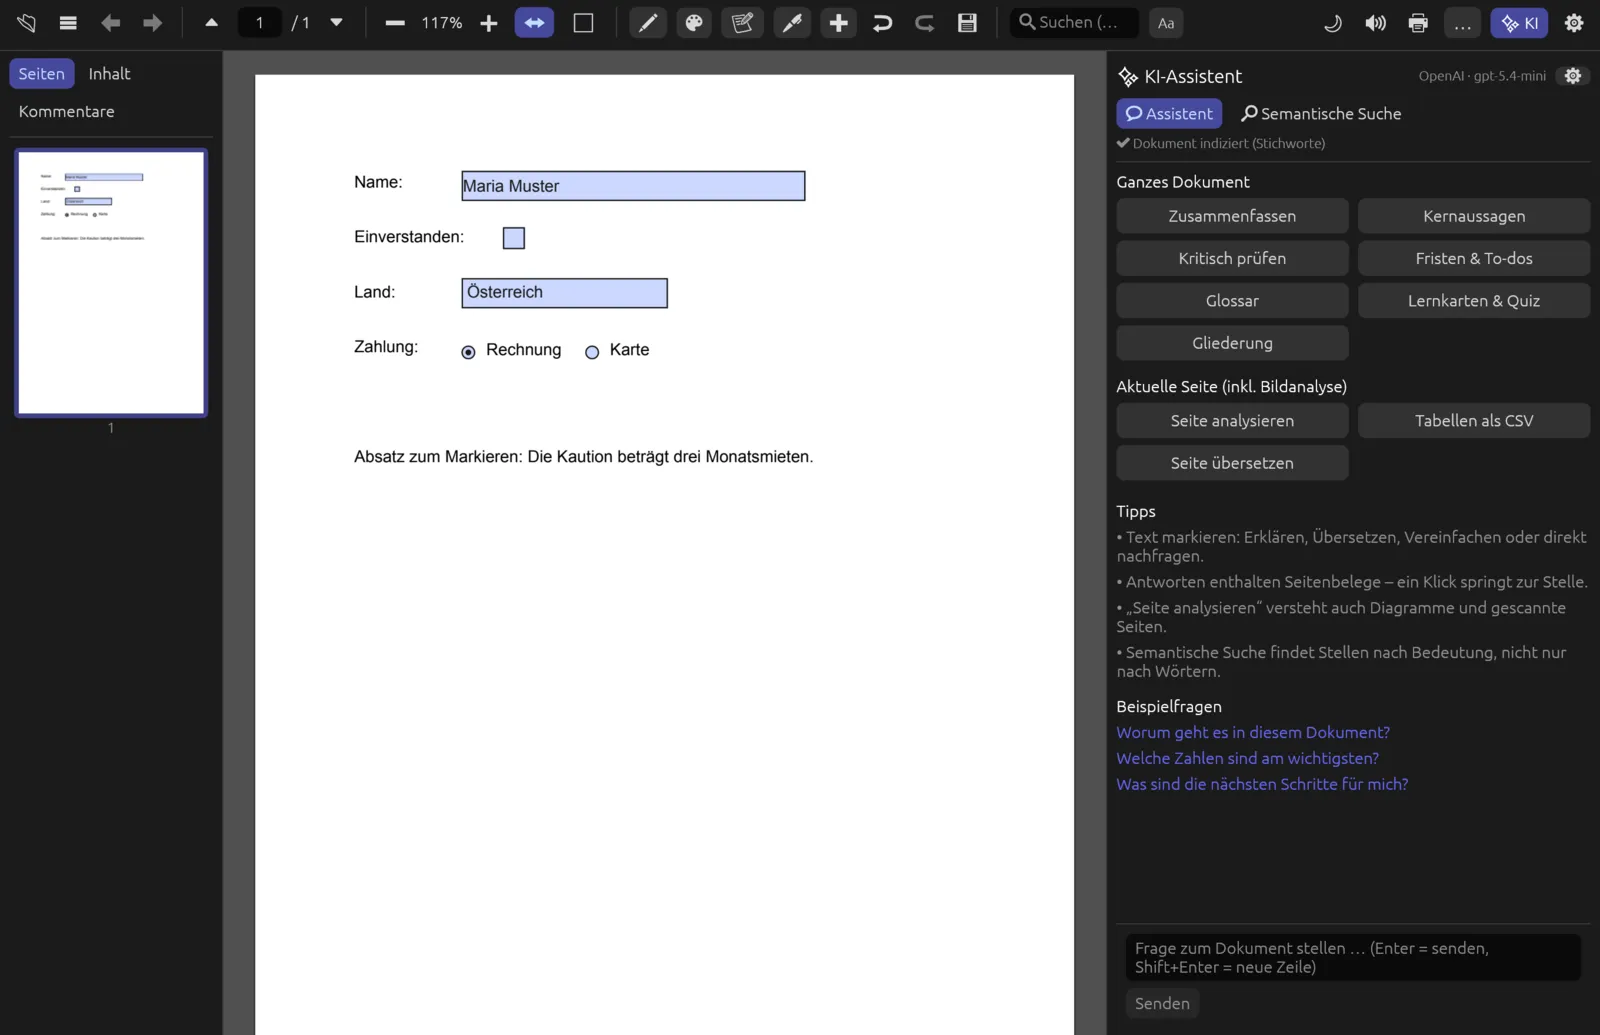
| Field type | How to fill it in |
|---|---|
| Text field | Click into it and type. Enter (in single-line fields) or a click elsewhere applies the value; Esc discards your input. Multi-line fields and password fields (input is hidden) are supported. |
| Checkbox | A click sets or clears the tick. |
| Option button | A click selects this option; the others in the group are deselected. |
| Drop-down list | A click opens the list below the field; a click on an entry selects it. Esc or a click elsewhere closes the list without a change. |
Filling in and saving a form
- Open the PDF form.
- Click into the first text field, type your entry and press Enter.
- Tick boxes and choose options with a click; open drop-down lists and pick an entry.
- If you mistype, ⌘ Z reverts the last entry.
- Save with ⌘ S – or with (save as) if you want to keep the blank form.
Pagelier writes the values into the PDF's form fields. Other programs therefore show them as filled-in fields that can still be changed.
Creating form fields
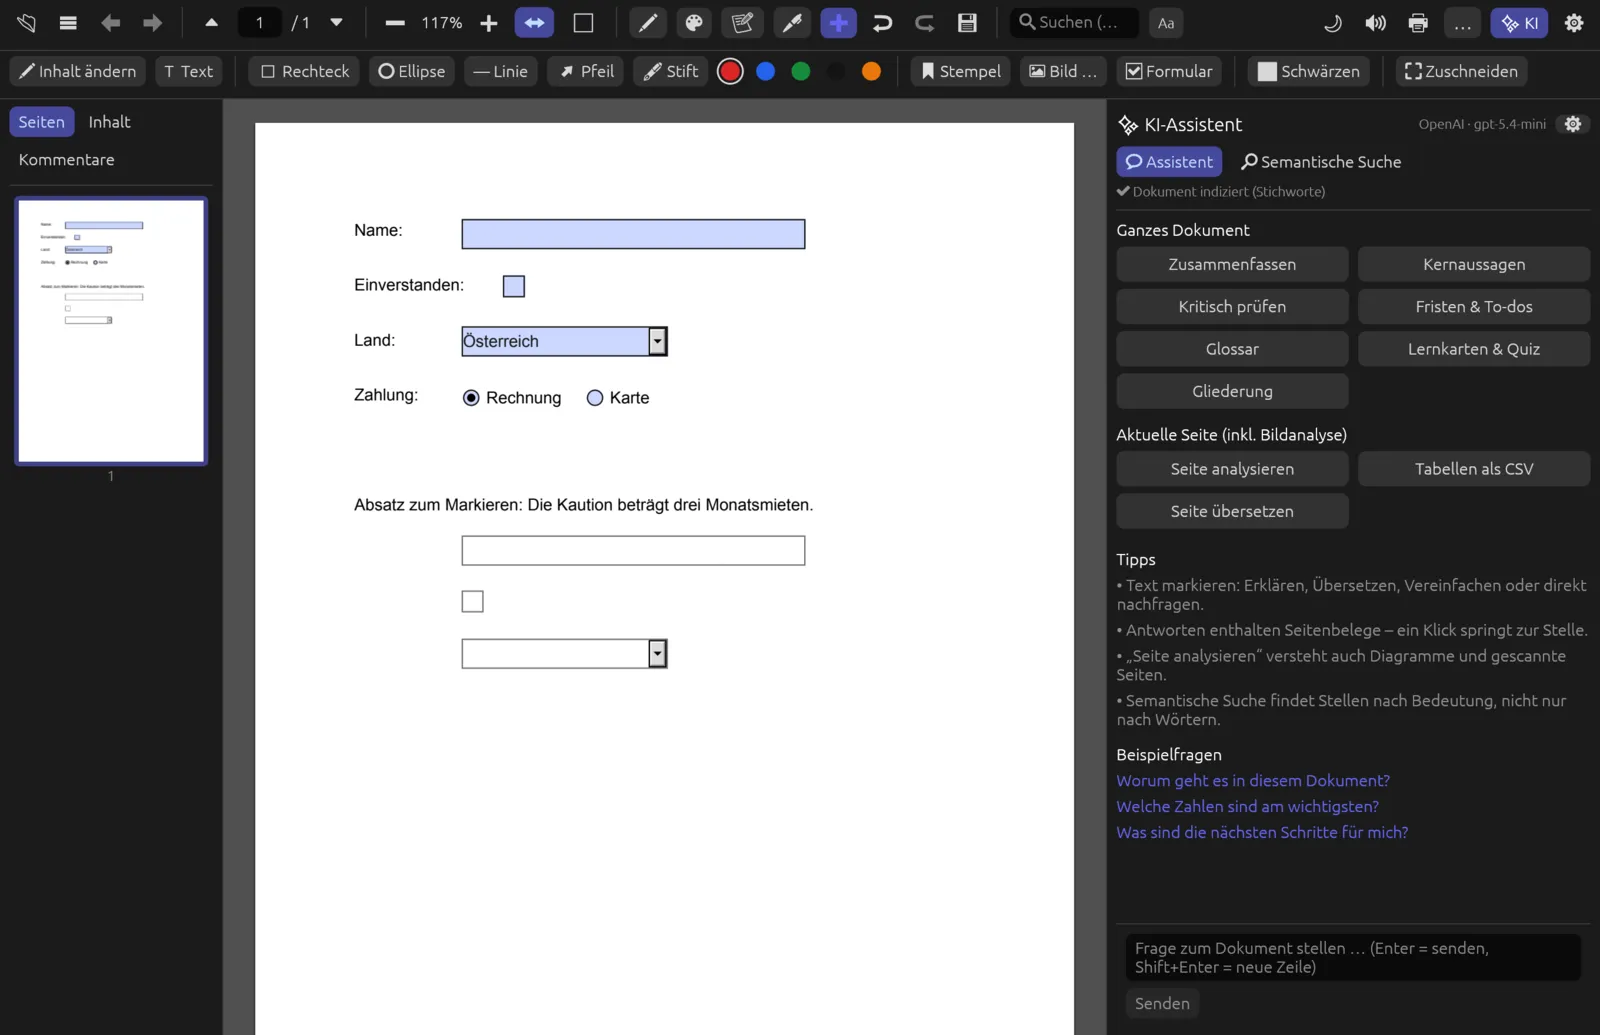
You can turn any PDF – such as a sheet designed in Word – into a fillable form. The ☑ Formular (form) menu in the editing bar (show it with ✚, see Editing) offers three field types:
- Textfeld (text field) – for names, addresses, amounts.
- ☑ Kontrollkästchen (checkbox) – for ticking.
- Auswahlliste (drop-down list) – a field with predefined entries to choose from.
Once a field type is chosen, the ☑ Formular button is highlighted in colour. Then drag out a rectangle of the size you want on the page. A simple click without dragging creates a field of standard size (text field and drop-down list 160 × 20 pt, checkbox 14 × 14 pt). The tool stays active so that you can create several fields in a row; Esc ends it.
Pagelier numbers new fields consecutively: “Textfeld 1”, “Kontrollkästchen 1”, “Auswahl 1” and so on. Only for drop-down lists can you choose the name yourself.
Creating a drop-down list
- Show the editing bar with ✚ and choose Auswahlliste in the ☑ Formular menu.
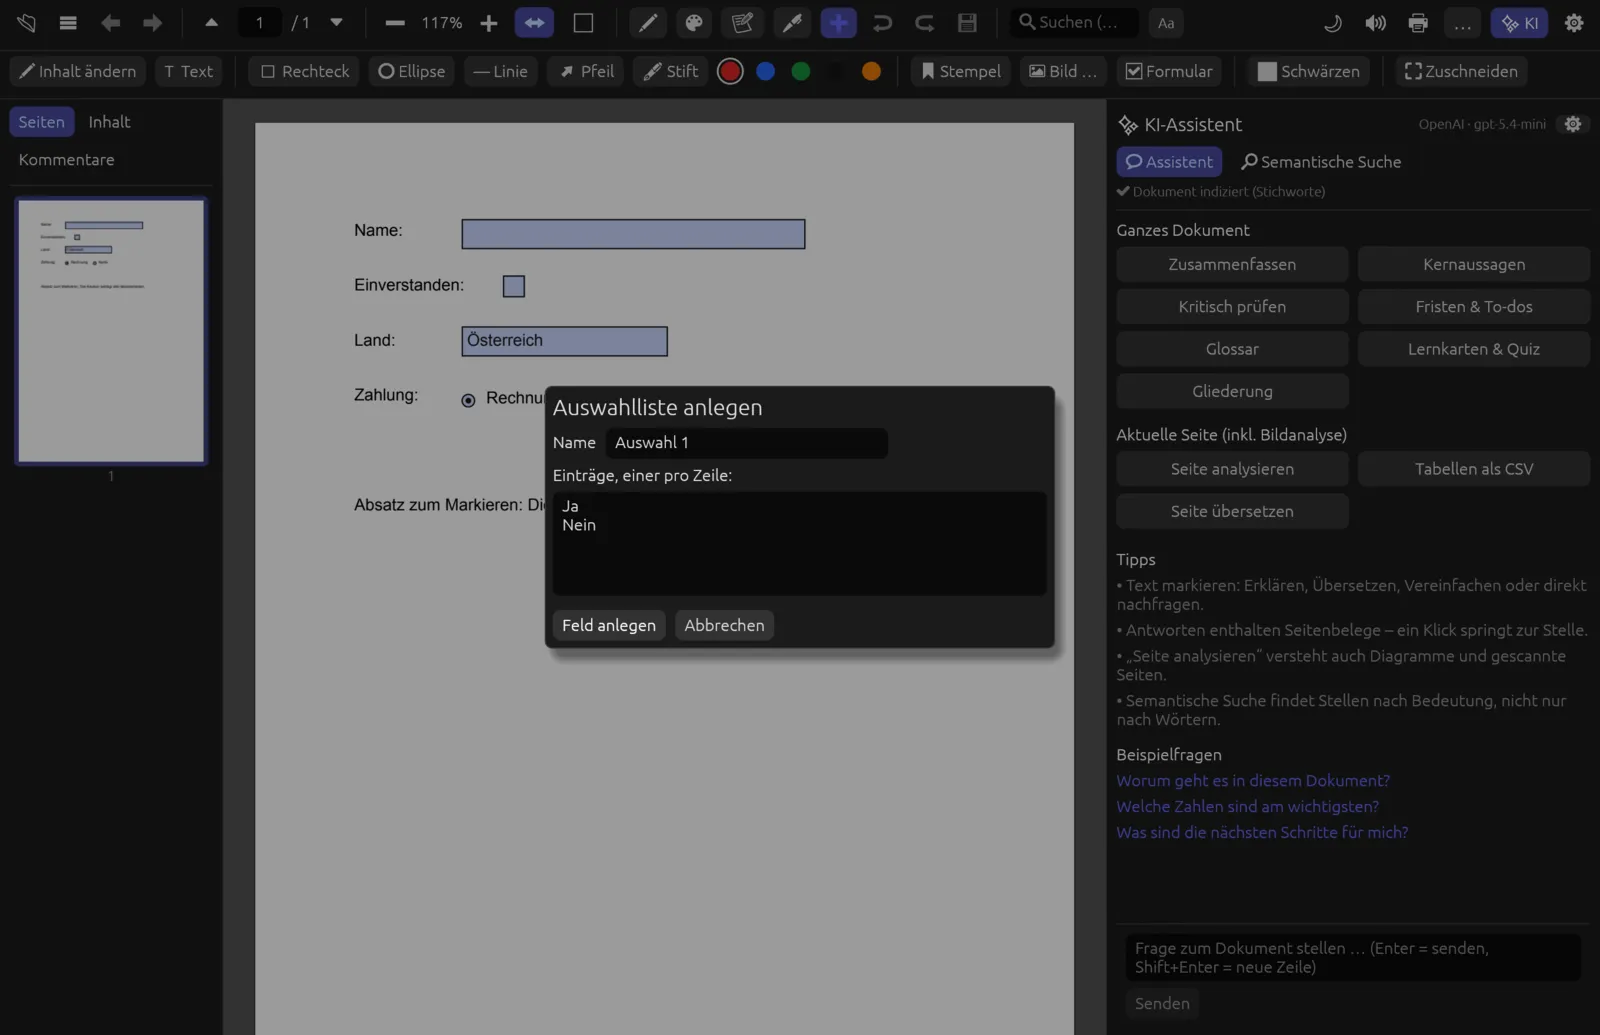
- Drag out the field on the page. The Auswahlliste anlegen (create drop-down list) dialog opens.
- Change the field's Name if you like.
- Under Einträge, einer pro Zeile: (entries, one per line) type the choices, each on its own line.
- Click Feld anlegen (create field). The button only becomes active once there is a name and at least one entry.
Deleting fields
Right-click a field. The context menu names the field (“Formularfeld „Textfeld 1““) and offers 🗑 Formularfeld löschen (delete form field). This works for fields you created and for existing ones alike. While the ✏ Inhalt ändern tool is active this menu does not appear – switch that tool off first.
Pagelier does not offer further field types (such as option buttons or date fields), required fields, formats or renaming fields afterwards. You can, however, fill in existing fields of these kinds.
Drawing and placing a signature
The fountain-pen icon 🖊 in the toolbar (tooltip Unterschreiben – sign) puts your handwritten signature on the page. The first time, you draw it once; Pagelier stores it in its settings on this computer and reuses it from then on.
Signing for the first time
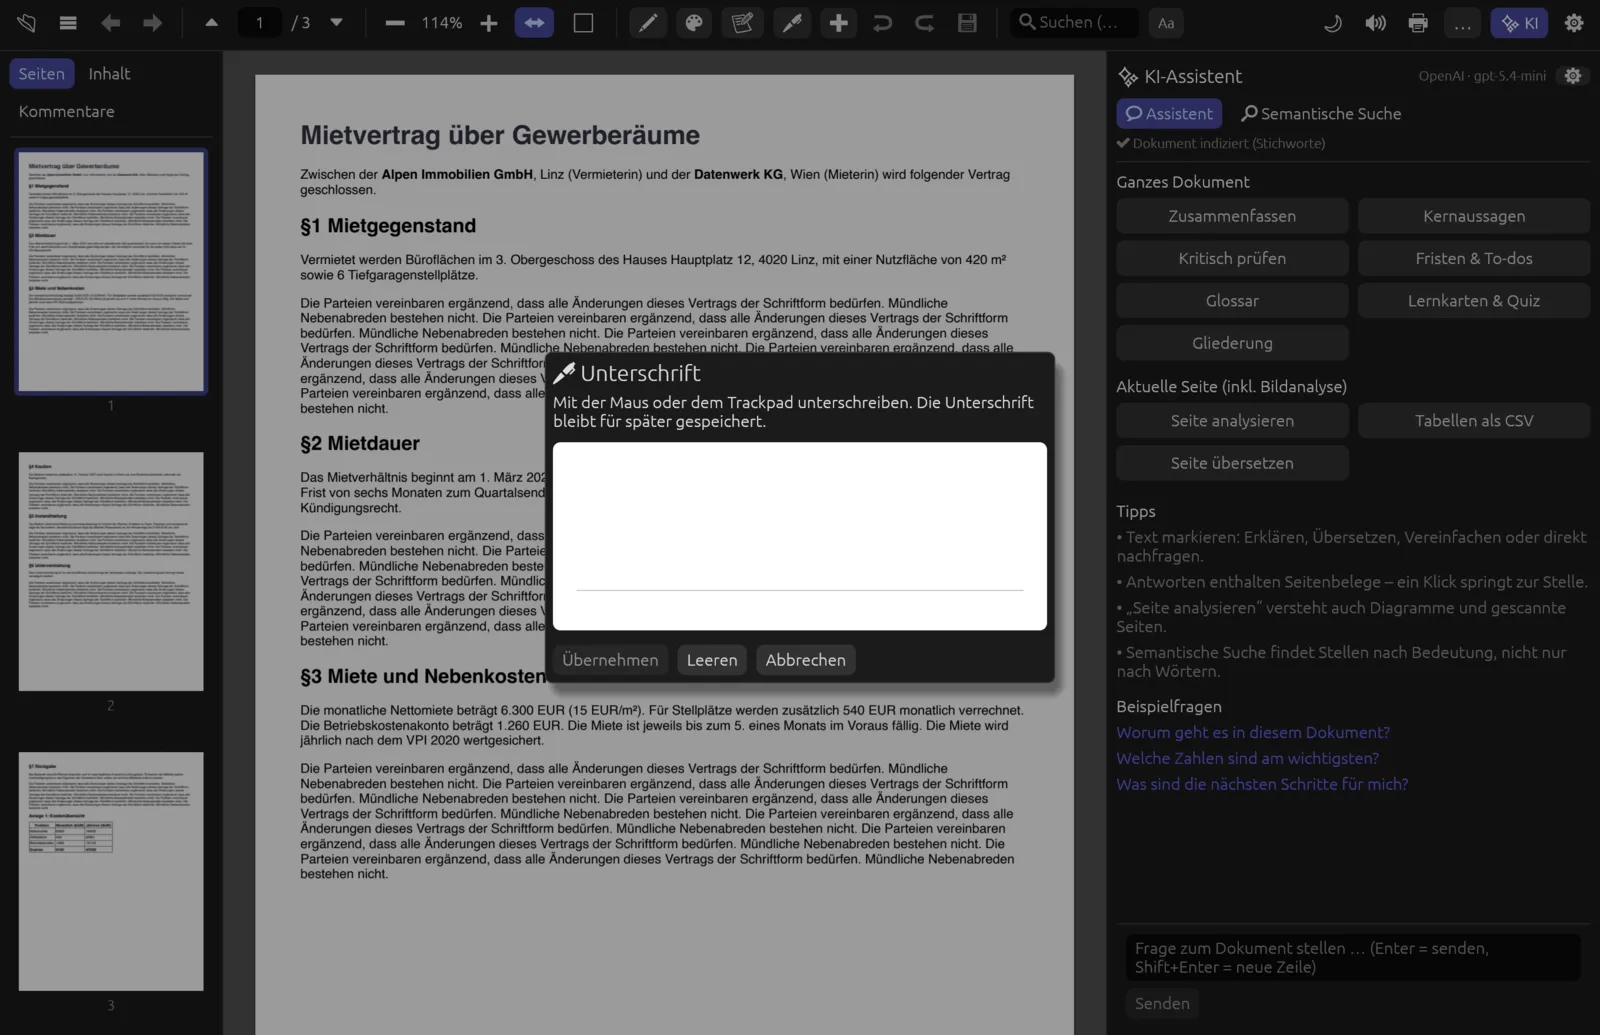
- Click 🖊 in the toolbar. The Unterschrift window opens.
- Sign in the white area by holding down the mouse button or on the trackpad. You can make several strokes; Leeren (clear) starts over.
- Click Übernehmen (apply). Pagelier reports “Unterschrift gespeichert – jetzt auf die Seite klicken” (signature saved – now click on the page).
- Move the mouse over the page – a faint preview of the signature follows the pointer.
- Click where the signature should go. It is centred on that spot, about 6 cm wide, in dark blue ink.
- Save the document.
From the second time on, one click on 🖊 and one on the page is all it takes. To draw a new signature, right-click 🖊 and choose Neue Unterschrift zeichnen … (draw new signature).
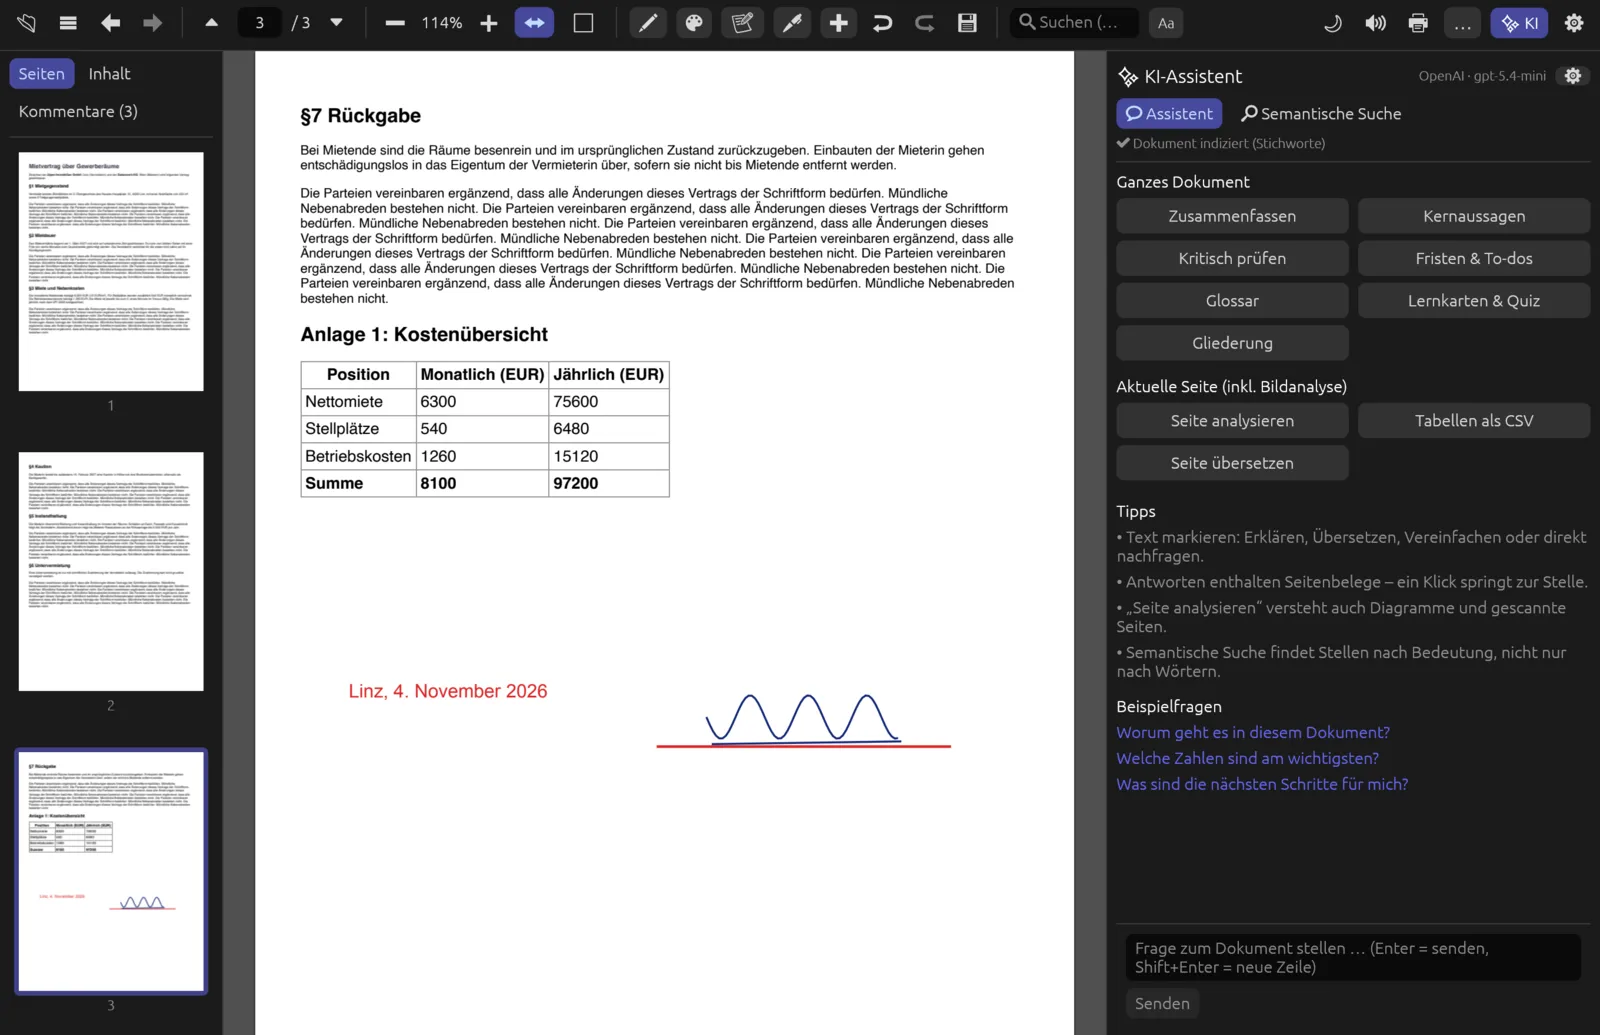
The placed signature is a freehand annotation. It appears in the comment list as “Freihand” (freehand) and can be removed there or by right-clicking it and choosing Anmerkung löschen.
A placed signature is a picture of your handwriting, not a digital signature: it does not prove who signed, and it does not protect the document against later changes. Where that matters, sign the PDF with a certificate – see Redacting, Protecting & Signing.